

How To Decorate A Cabinet Door With Vinyl Lettering
My not-so-contempo bathroom refresh included a temporary wall treatment that will work great in whatever dwelling, but specially an flat! Today, acquire how to use vinyl decals for a wallpaper look!
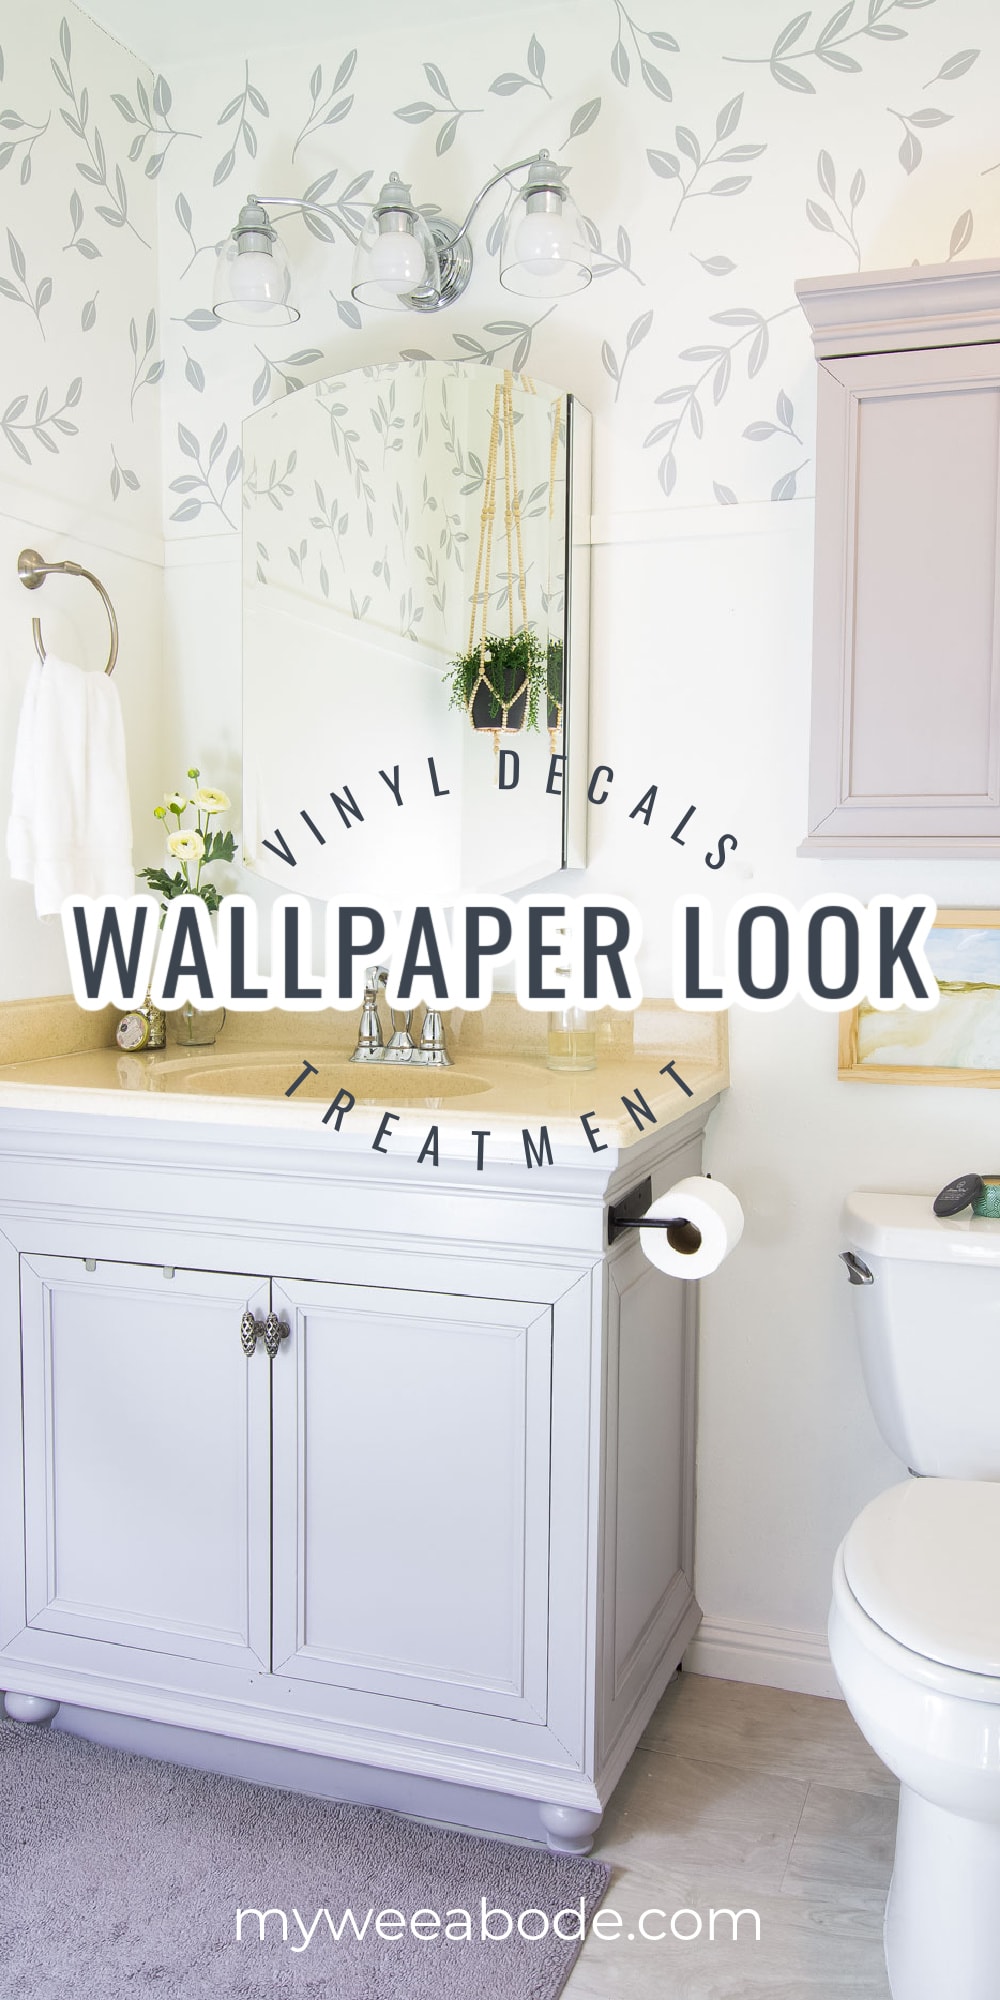
HOW TO USE VINYL DECALS FOR A WALLPAPER LOOK
Take you had a hazard to run across my modern littoral bathroom update? Information technology took a long infinitesimal to finish, just it was sure worth the wait… at least for me it was!
The updates included:
- Repainting the ugly yellow cabinets
- Updating the former biscuit shower tile surroundings (This was actually my favorite project.)
- Adding a new low-cal fixture
- and, irresolute out the old faucet
- plus a whole lot more!
And then there was the wall treatment…
Considering I alive in an apartment, I needed a wall treatment that was 'temporary'.
Let me tell you lot, trying to effigy out how to add a removable wall treatment to my orange peel bathroom was a bit of a nightmare an adventure.
First, I tried removable wallpaper. Repositionable wallpaper is normally a perfect solution to a wall treatment in a rental habitation. But, with the humidity in the bathroom and the orangish peel wall texture, the test strip just wouldn't 'stick'. (Remember, always do a test strip with removable wallpaper. During the summer, temporary wallpaper won't even stay adhered in my living room!)
Next, I used a stencil. Unfortunately, with the orange peel, and the look I wanted, it was merely Also difficult. At least it was as well hard for this Thou-ma who needs to get out and go some exercise! However, I think using a different mode stencil on a different wall would have worked great. I'm hoping to try this technique over again in the futurity (after I've shed a few pounds, perchance?!) 😉
If I told you that this temporary wall treatment issue kept me upwardly at night, would you believe me?
Well, it DID!
Several ideas rattled around in my noggin' for quite a few days and nights! So I remembered…
This post may contain affiliate links, at no boosted toll to you. For more information, see my complete disclosure HERE.
The Solution: Vinyl Decal Wallpaper Look
I got a Cricut for my birthday!
So I started my research for creating vinyl decals for the bath walls.
Using the Cricut Design Space, I found several arrangements of vine-blazon leaves, and decided to try it.
The Cricut Pattern Infinite has all kinds of SVG files to use for projects, along with lots of projects, tutorials, and and so much more than. I paid the monthly fee (almost $10) and started creating!
Tips and Tricks for How to Add together Vinyl Decals for a Wallpaper Look
Let'southward have a look at some central tips for successfully creating a temporary wall handling in your bath!
What Materials Tools Are Needed to Make a Vinyl Decal?
Believe me, having the right tools for THIS job is admittedly necessary!
Usually I tin can 'fly-it' for a lot of DIYs. And I *did* try go by with what I had for this project, as well. But, it just didn't give the aforementioned results every bit when I finally broke downwards and purchased the all-time tools for adding vinyl decals to a bathroom wall.
Here's what you lot'll need:
- Cricut Explorer two, or your favorite cutting machine
- Basic Cutting Prepare
- Diverseness Pack Cut Mats (Y'all'll apply the Low-cal Grip mat)
- Vinyl Transfer Tape
- Adhesive Vinyl, I used this brand, and it worked GREAT!
- Frog Tape
- Pilus dryer
How to Make Vinyl Decals?
Learning how to brand vinyl decals with your Cricut is easy to figure out with the instructions that are enclosed in the box. And, there are SO many YouTube videos that y'all tin search for, besides.
Nevertheless, here are a few tips that will help to fine-melody your vinyl decal project. And, to be honest, I just contacted the Assist Desk at Cricut for most of these tips! The Cricut Design Infinite Assistance Desk really is that… helpful!
- Use the Calorie-free Grip mat and be aware that the knife can cut completely through the vinyl. Plainly, this isn't good. There is really a setting in the Cricut Design Space app that will go on the pocketknife from cutting too deeply.
- When arranging SVG files, arrange and rearrange the unlike files (I had at least five different files) to get the most out of the vinyl.
- Before using the vinyl, do practice cuts on cardstock.
- To add together the vinyl to the mat, keep the roll attached. Later on the decals are cut, pare the vinyl off the mat past bending the mat back and away. This keeps the vinyl smooth. Then cut away the vinyl with the decals away from the roll.
I'll share more tips along the manner, with photos, too!
Test Your Vinyl Wall Decals
So, hither's an ugly photo for you!
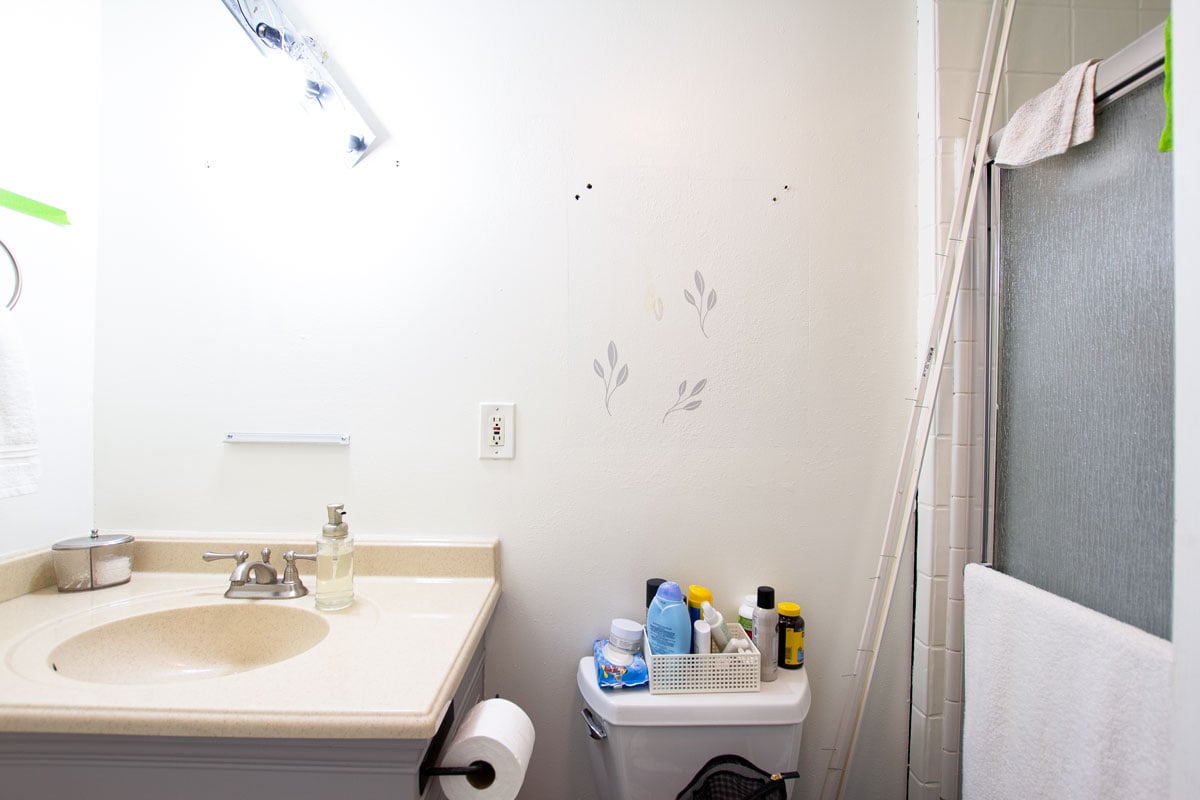
Outset, be sure your vinyl decals are the size you lot want. The best manner is to impress different sizes and place them on the wall.
Besides, leave the decals on for a few days to run across how they react to the elements in your infinite. For me, the steam from the shower, humidity from the weather, and the texture of the walls all played into whether or not the vinyl decals would work. And work they did!
Prep Walls and Arrange Your Vinyl Decals for Wallpaper
Be sure to clean your bath walls before starting this project. Information technology's really important that the decals have a very clean surface to 'stick' to. Using an all-purpose cleaner and some microfiber cloths worked bully for me!
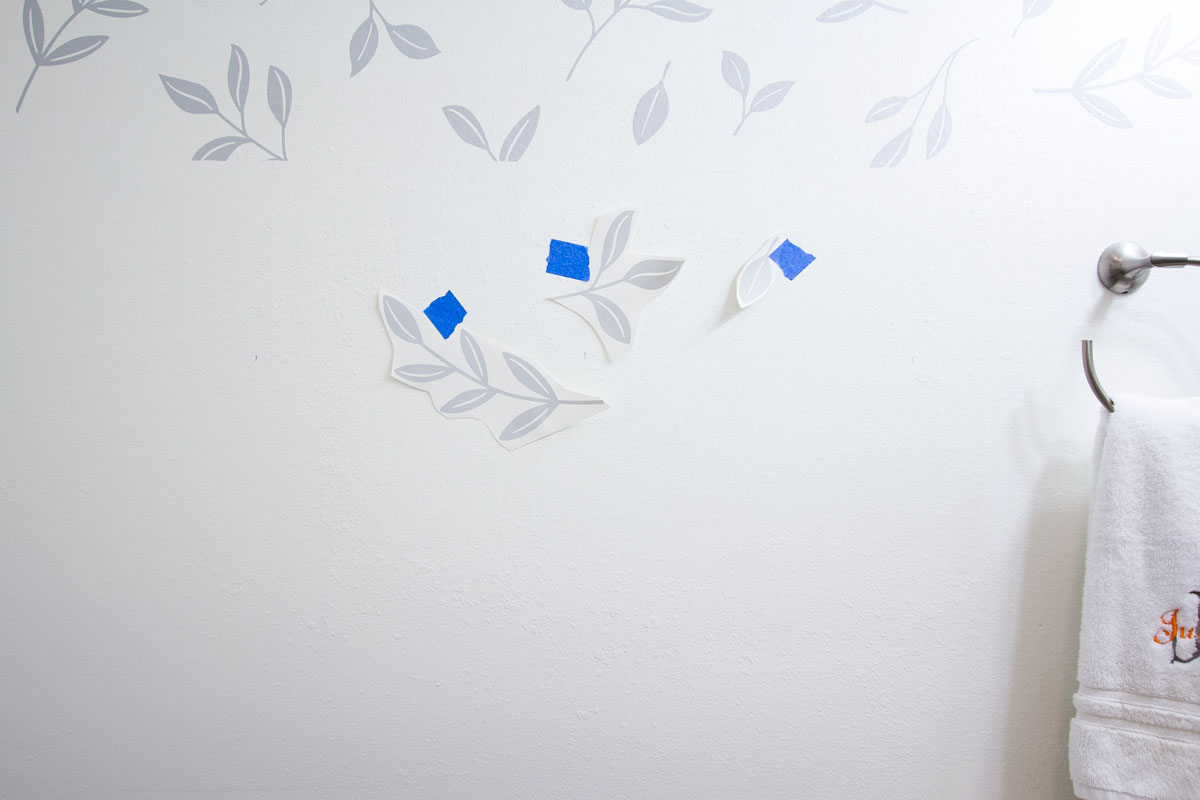
After you accept cut out your decals, take some painter's tape and adapt them on your wall.
When you lot have a variety of vinyl stickers that are random, you tin can pretty much arrange them to your liking. If you use a more uniform design (like something that needs to become in rows, etc.) exist sure to mensurate and arrange systematically.
If yous want to add some wood trim or another element to the wall afterwards the decals are affixed, add together a strip of dark-green frog tape to be a 'placer' BEFORE you outset adding your decals. This will show y'all where you lot need to cut away excess vinyl.
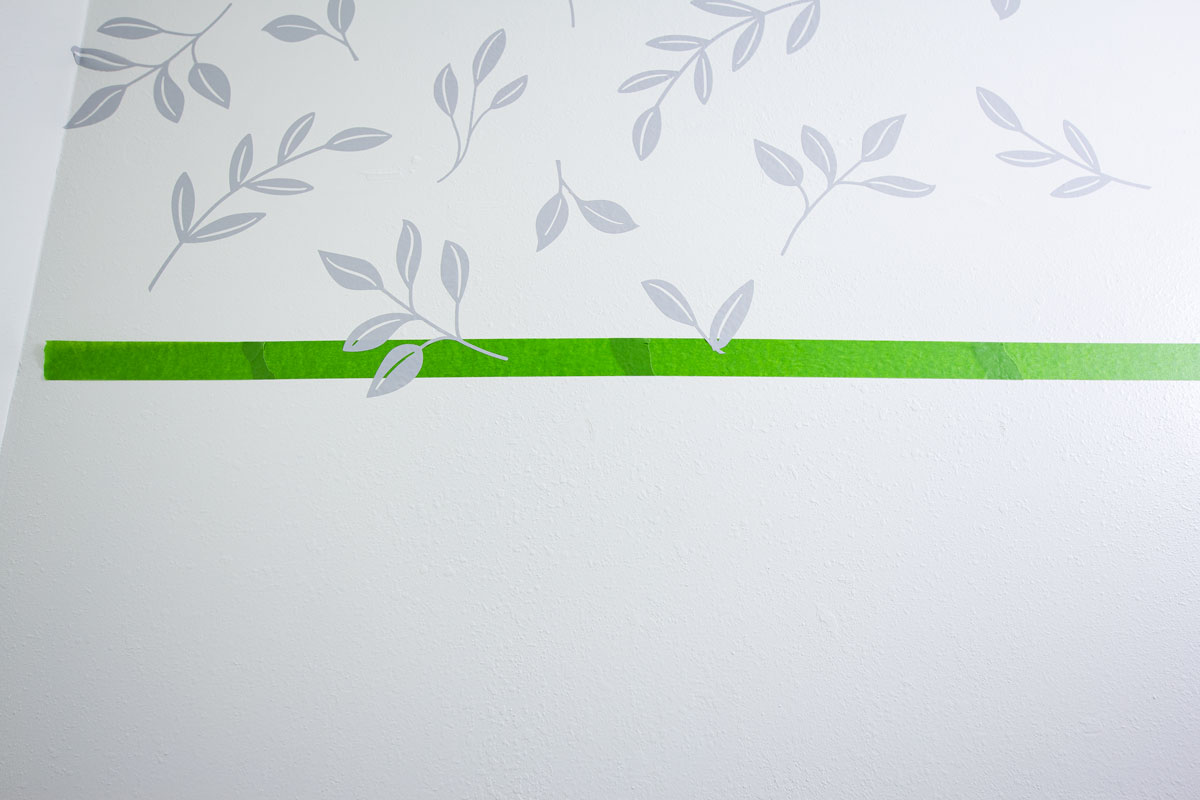
Make sure to marshal the Frog Tape straight on the wall… and check with a level. 🙂
How to Employ Vinyl Decals for a Wallpaper Look
Okay… here are the details of the all-time mode to really place your vinyl decals for a wallpaper look.
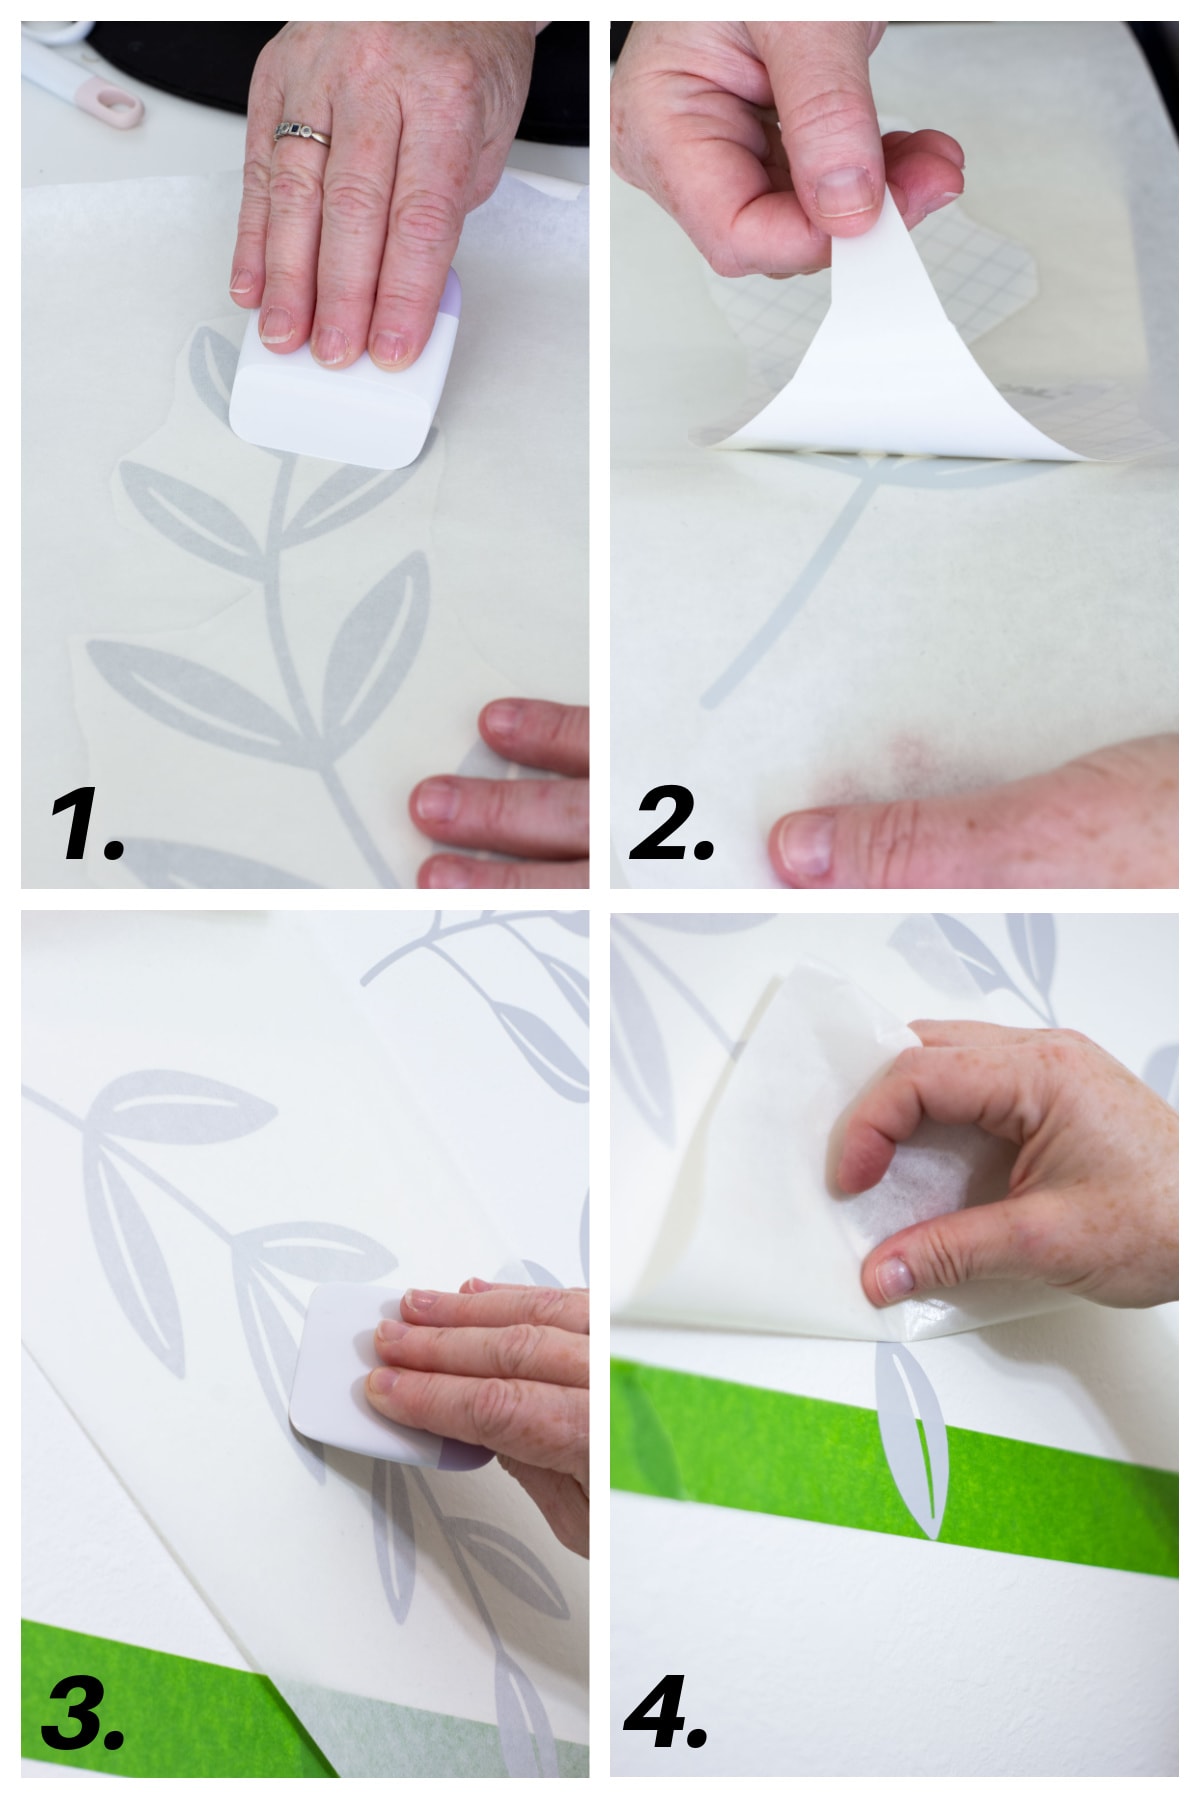
- After printing and trimming your decal, place it on the vinyl transfer tape and employ your smoother to go a firm and fifty-fifty 'grip' on the decal. (Photo 1)
- Remove the backing of the vinyl and so you have the decal'southward agglutinative side exposed. (Photo 2)
- Take the adhesive side of the decal and place information technology on the wall and firmly shine onto the wall. (Photo 3)
- Pull away the vinyl transfer tape from the decal. Be sure to pull the tape away every bit apartment against the wall as possible. This volition keep the decal from lifting off the wall. (Photo 4)
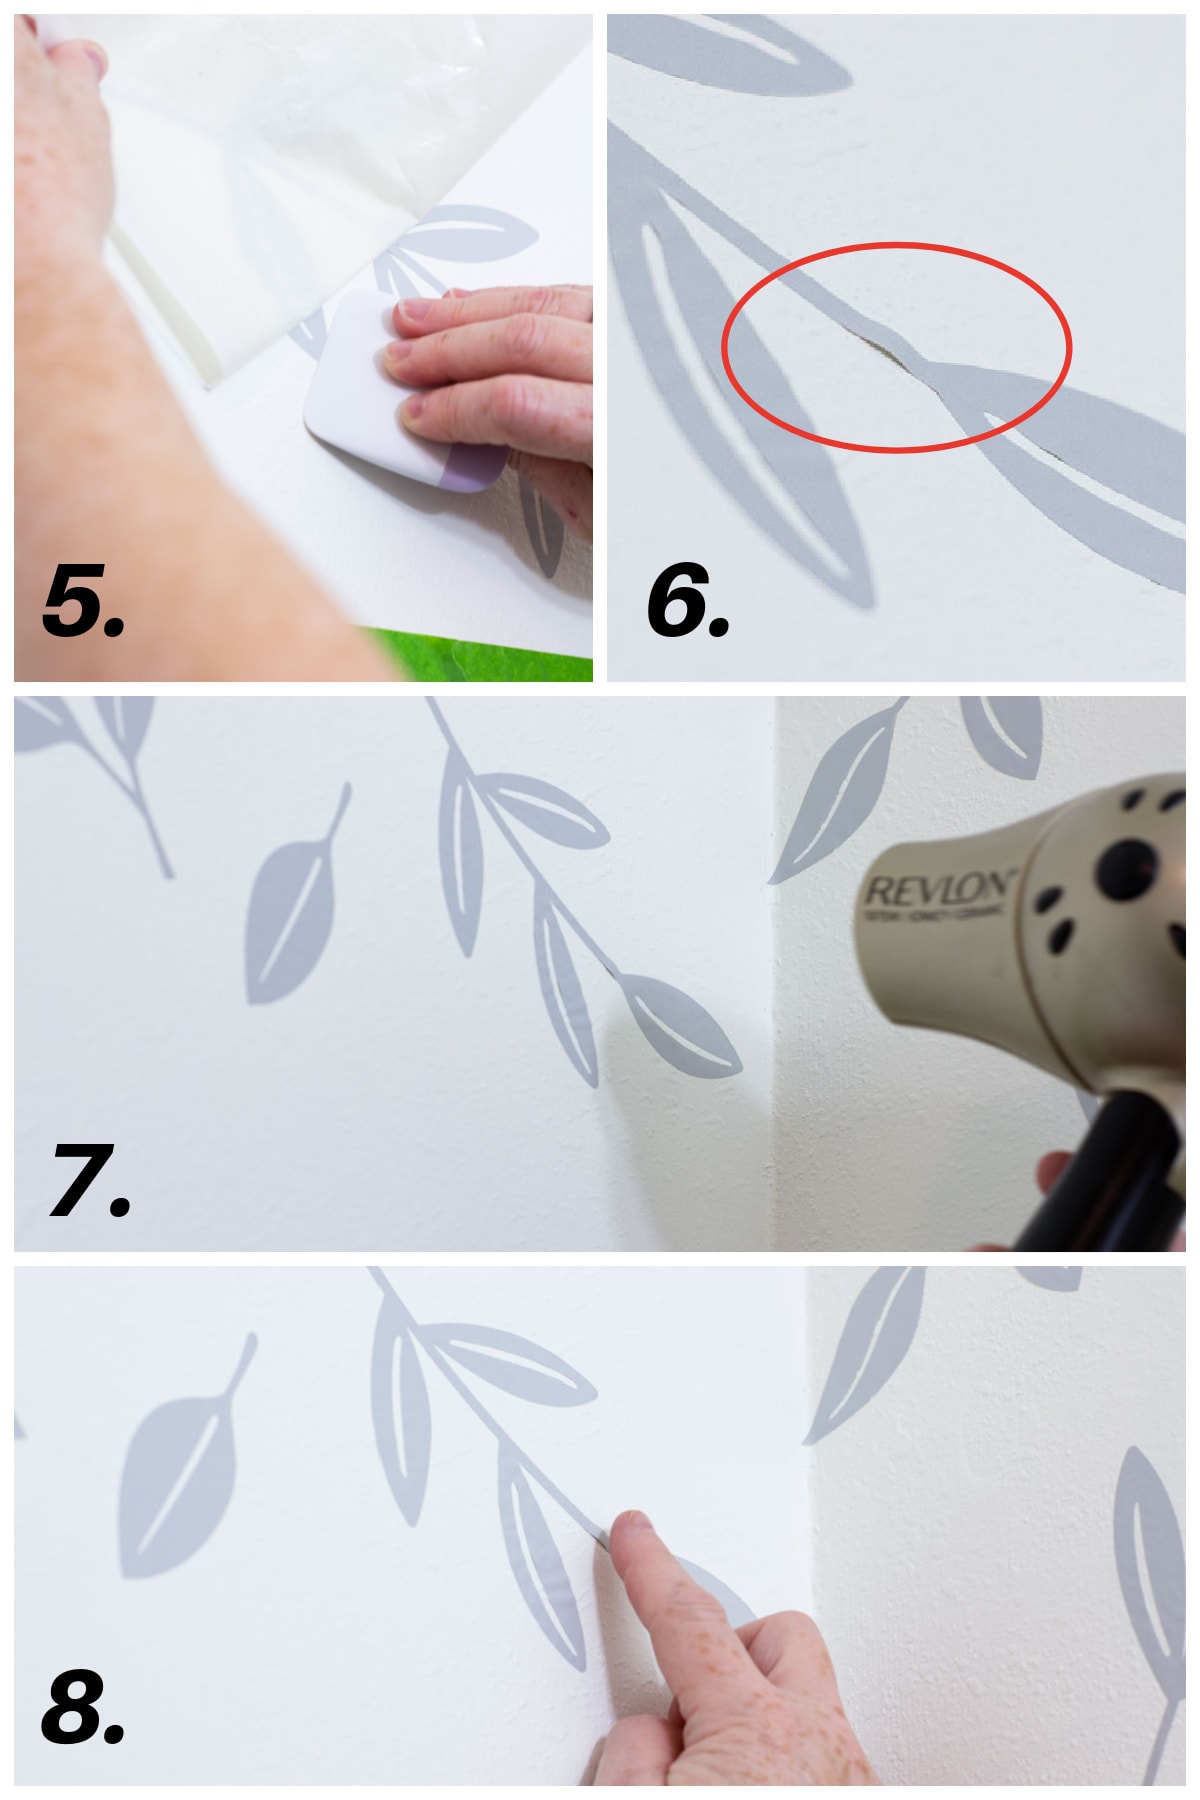
- Every bit you pull away the record, polish the decal with the smoothing tool. (Photograph 5)
- Sometimes, y'all may have some lifting of the decal. If this happens, use a hairdryer to 'warm' the decal, then smooth with your finger. (Photos 6-eight)
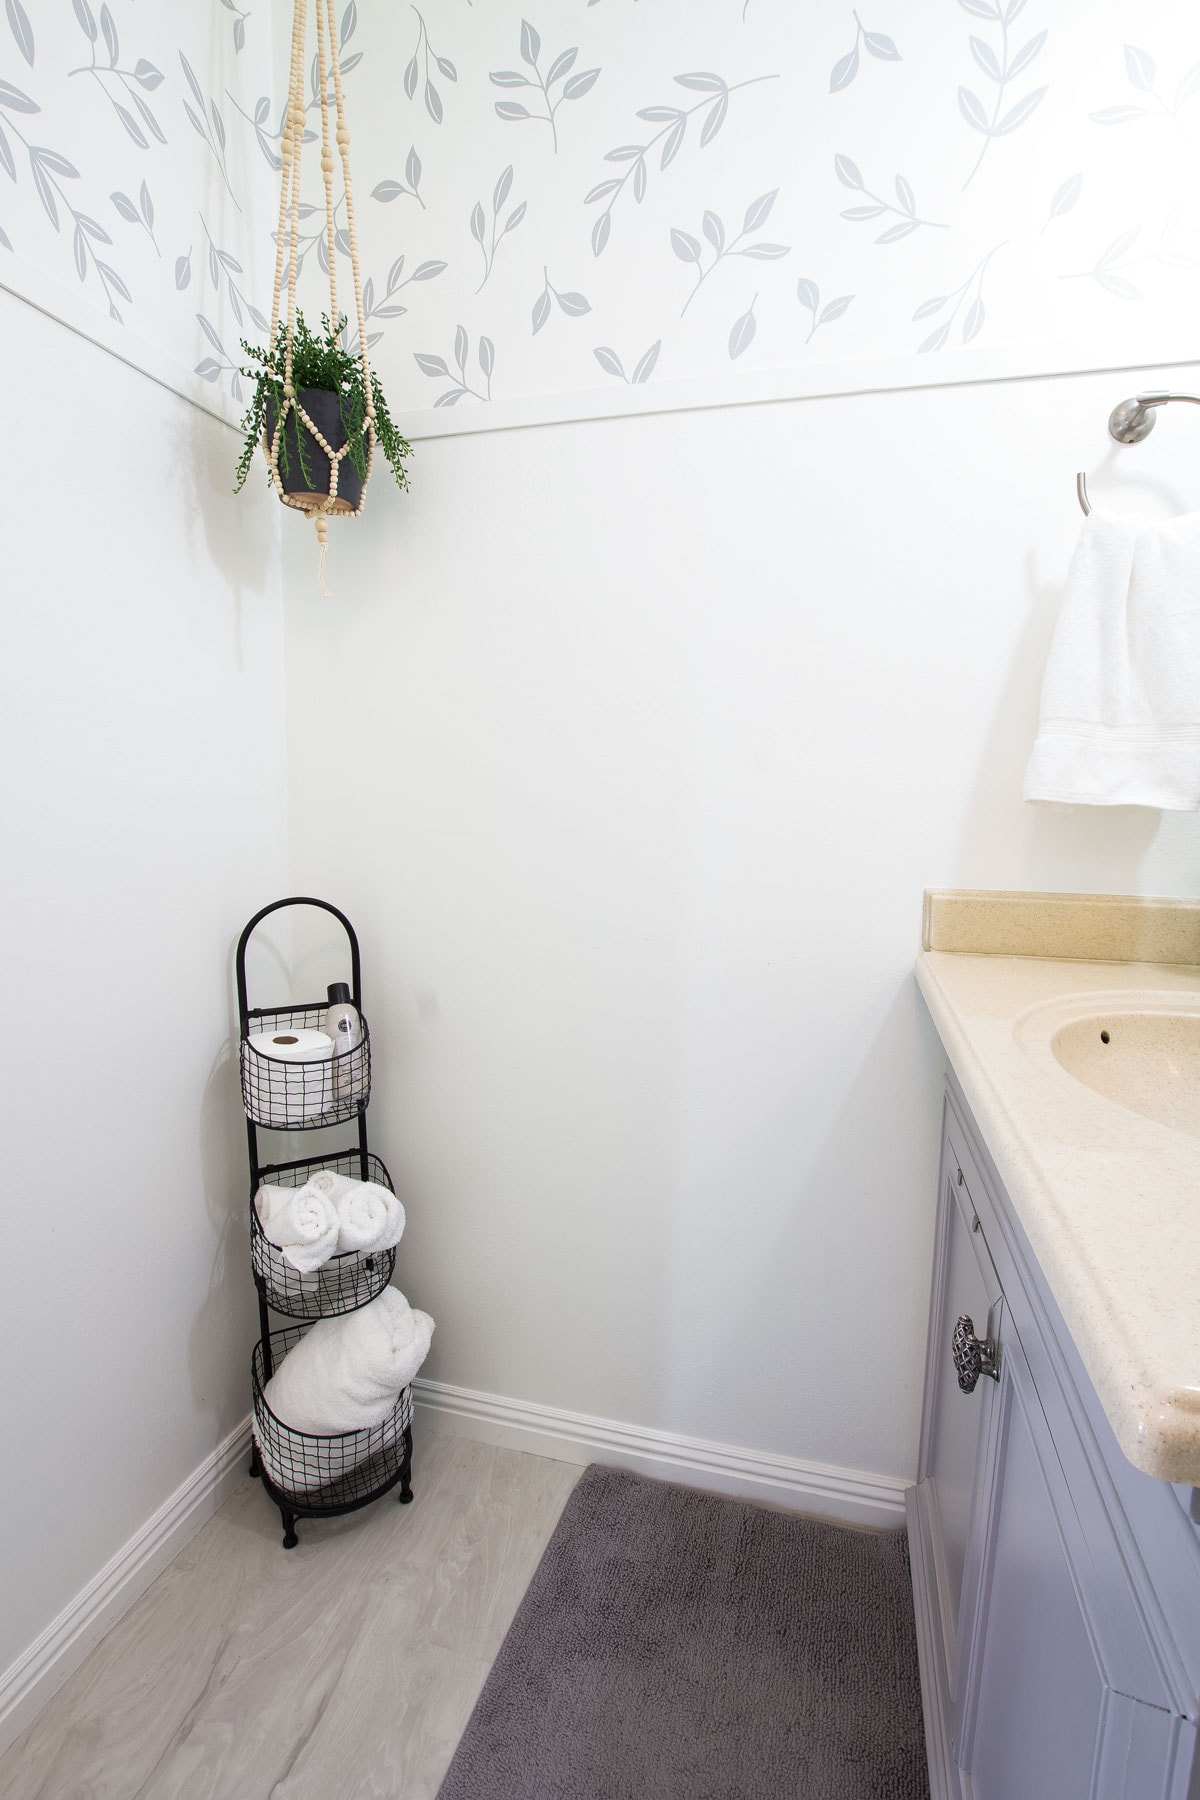
The Finished Wall Treatment with Vinyl Decals
Subsequently all was said and done, and I added the painted wood trim, I recollect the walls looked like they were wallpapered (or at to the lowest degree stenciled).
What exercise y'all think?
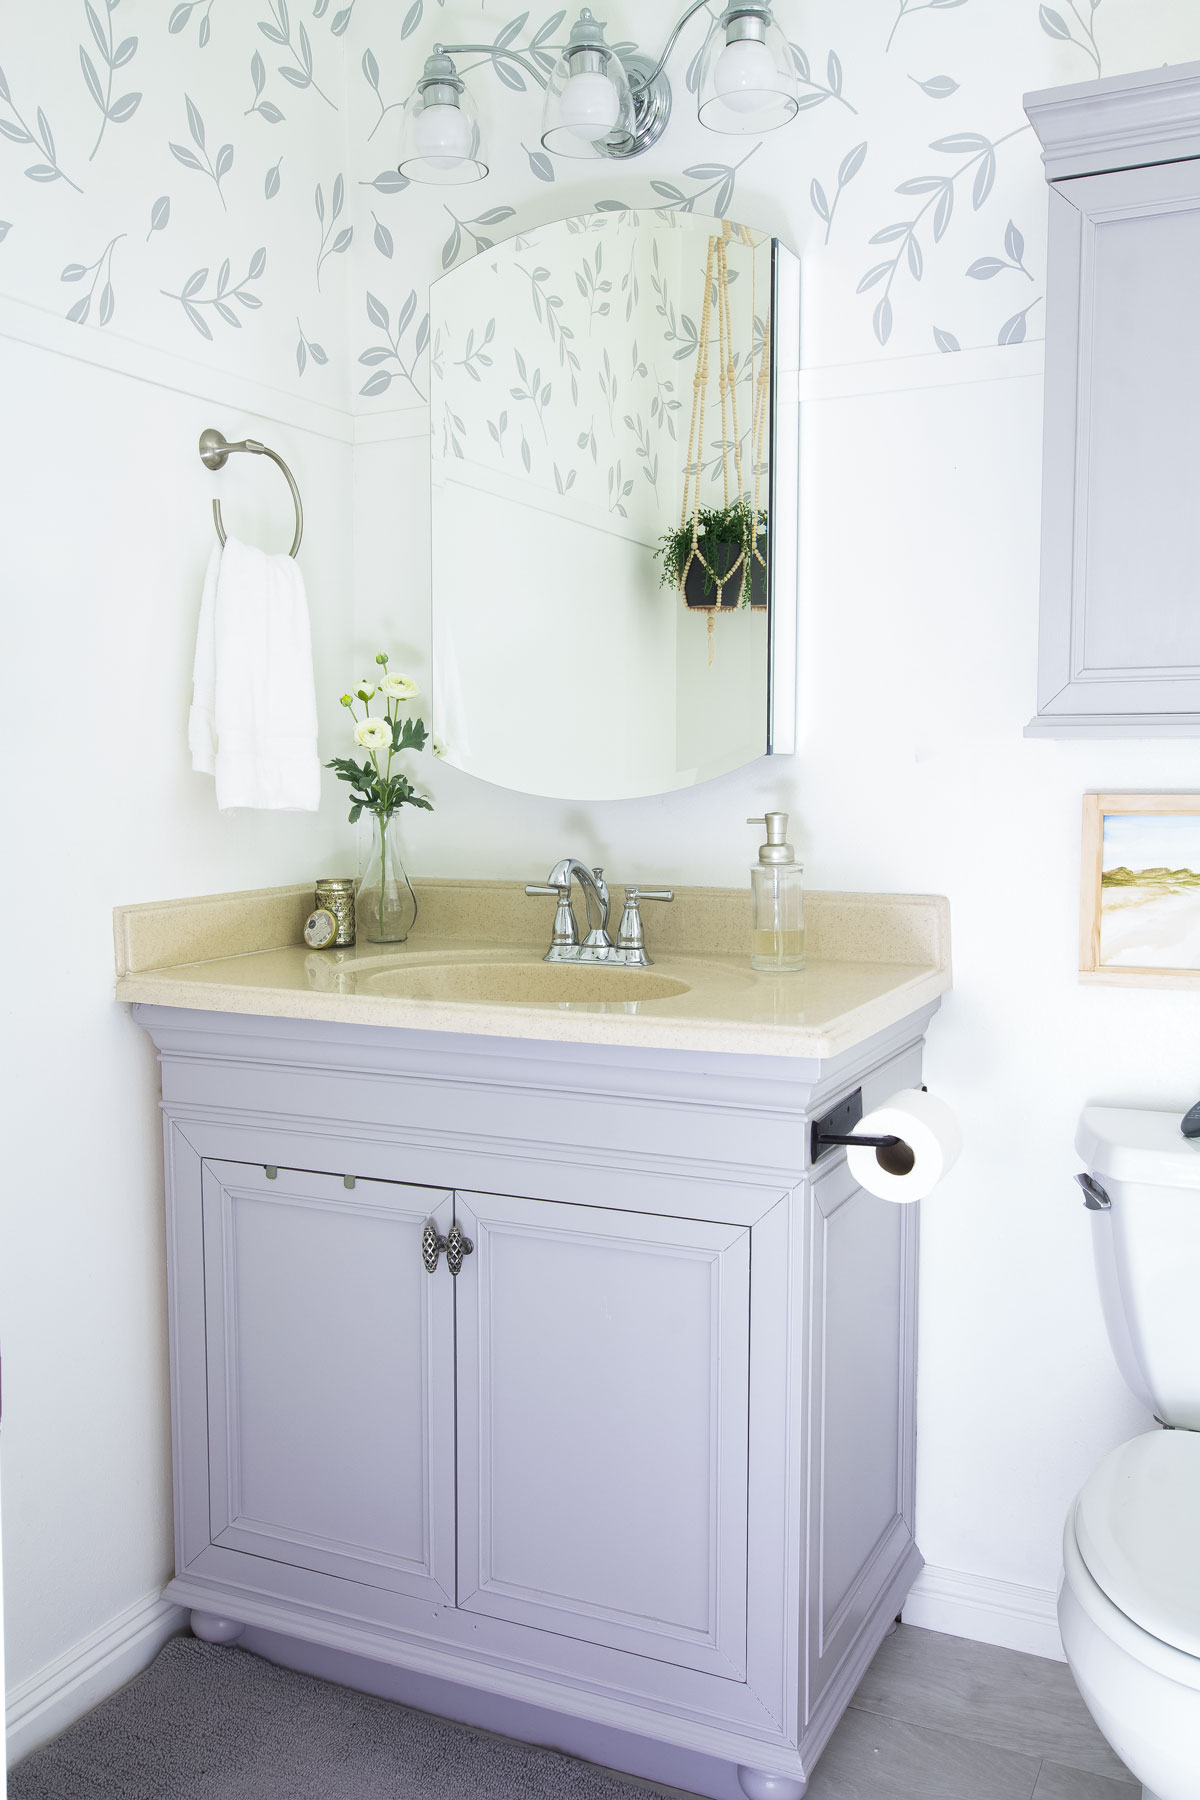
Even close-upward… it looks great!
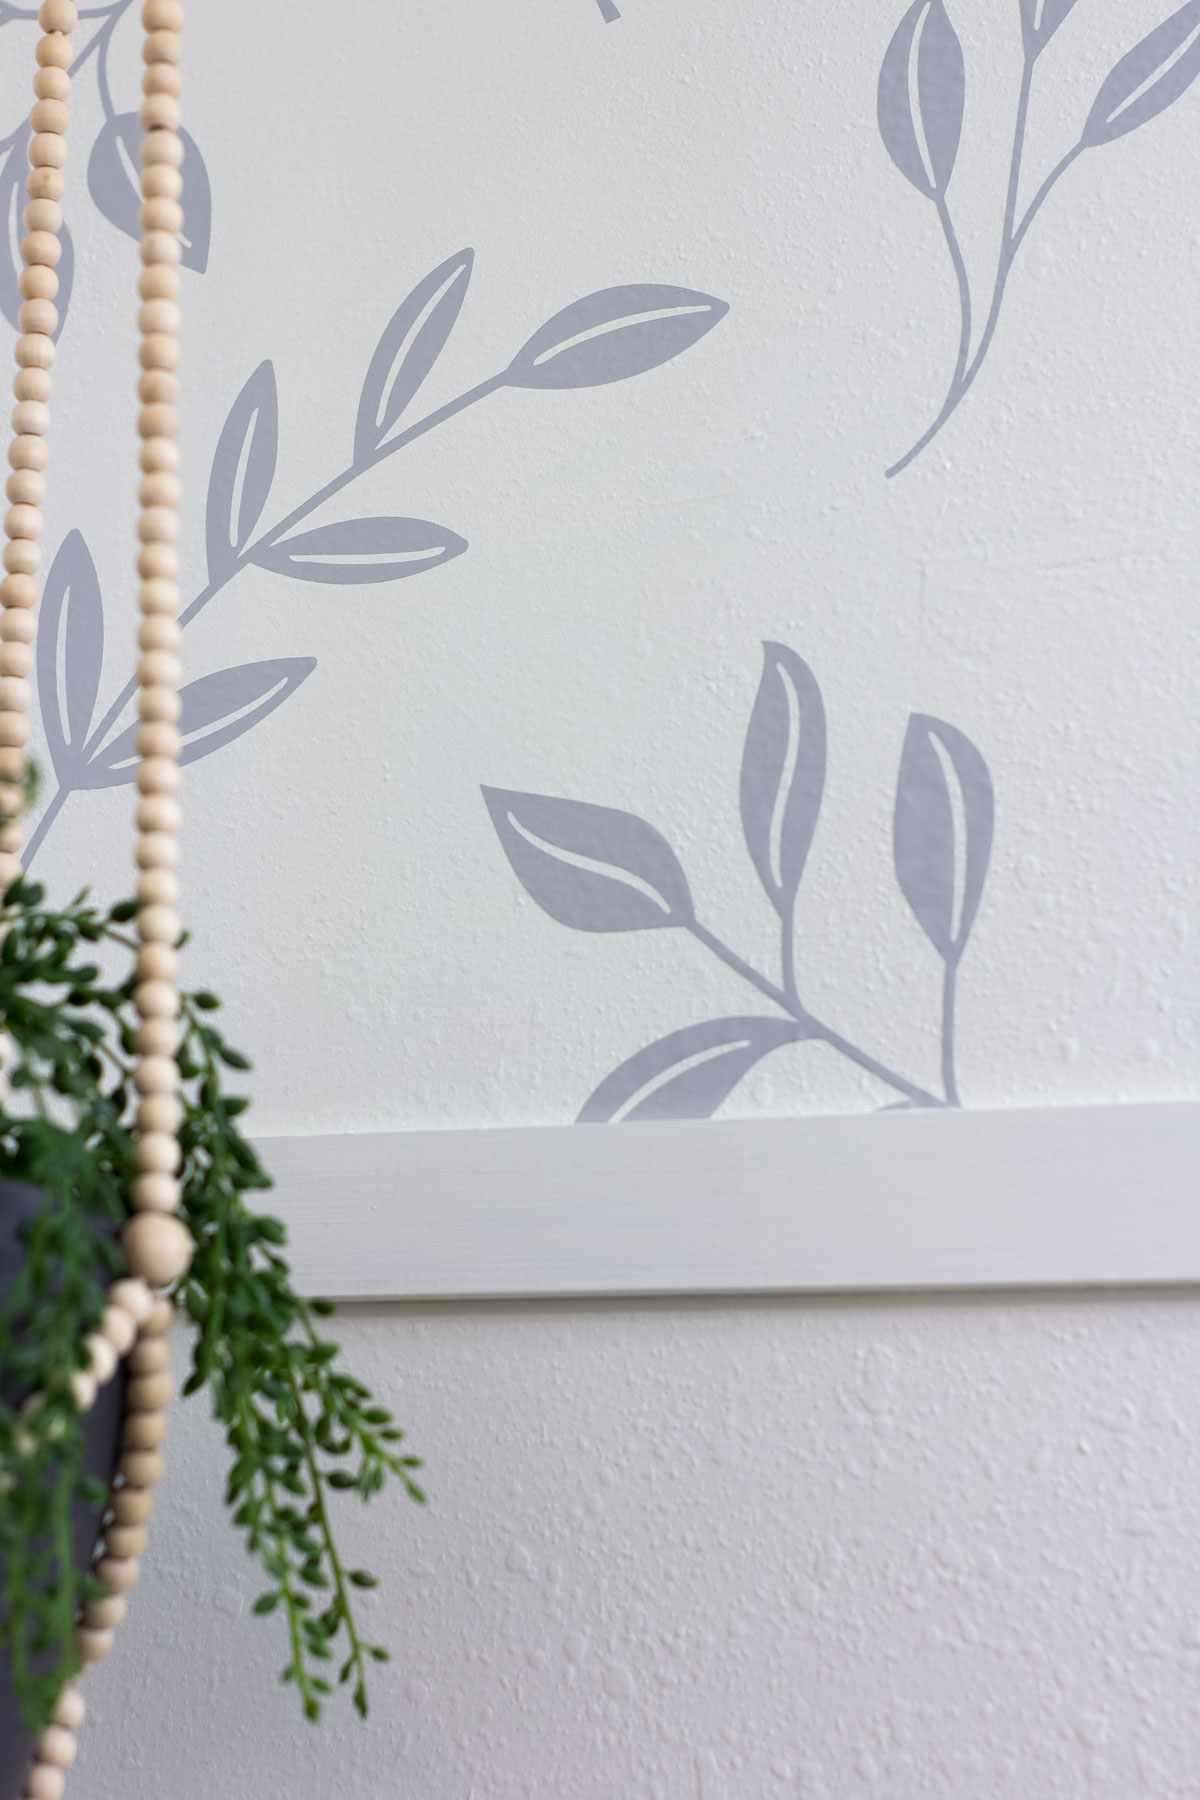
And after vi months, I'm happy to say, it looks every bit skilful as information technology did the first mean solar day!
Would you consider this wall handling technique? This vinyl wall decal process took about ii days total.
Do y'all have any questions that I may not take covered here? Let me know in the comments!
And for more tips and tricks on creating a vinyl decal wallpaper look, check out this post from Driven by Decor!


How To Decorate A Cabinet Door With Vinyl Lettering,
Source: https://myweeabode.com/vinyl-decal-wallpaper-look/
Posted by: overtonfriect.blogspot.com
0 Response to "How To Decorate A Cabinet Door With Vinyl Lettering"
Post a Comment